HMS Map Integration into Ionic Application | Installation and Example
Personalizing how your map displays and interacts with your users tailors their experience to them, not the other way around. Make location-based services work better for you so your app works better for your users.
Introduction
With the Huawei Maps SDK for Android, you can add maps to your application. You can also use API calls to add markers, polygons, and overlays to a basic map, and to change the user’s view of a particular map area. These objects provide additional information for map locations, and allow user interaction with the map. The API allows you to add these graphics to a map:
- Icons anchored (Markers) to specific positions on the map.
- Sets of line segments (Polylines).
- Enclosed segments (Polygons).
- Bitmap graphics anchored to specific positions on the map (Ground Overlays).
- Sets of images which are displayed on top of the base map tiles (Tile Overlays).

Prerequisites
- Before installing Map Kit, you should have installed npm, Node.js , ionic CLI. To install ionic in system use below command
2. Generate a Signing Certificate Fingerprint. For generating the SHA key, refer this article.
3. Create an app in the Huawei AppGallery connect and enable Map Kit in Manage API section. Provide the SHA Key in App Information Section.
4. Provide storage location.
5. Download the agconnect-services.json.
Installation
Open windows CMD or terminal , and create ionic project.
Download Cordova Map kit plugin. Navigate to your project root directory and install plugin using npm.
Install @ionic-native/core in your project for full ionic support with completion code.
Copy the “node_modules\@hmscore\cordova-plugin-hms-map\ionic\dist\hms-map” folder to “node_modules/@ionic-native” folder under your Ionic project. Now compile the project using below command.
where appId is package name.
After this command, you should add platform to the project. To add, follow command below:
Add agconnect-services.json and signing certificate jks file to the app directory in your Android project as shown below.

Add maven repository address and agconnect service dependencies in root level build.gradle
Add signing certificate configuration information in app-level build.gradle.
Using Cordova HMS Map Plugin
This section describes how to use the plugin to quickly obtain a map object, change the map type, display my-location on the map, and enable the map’s lite mode.
Creating Map Object
Every map object is bound to a div element in html file. Let’s create a div element in html and change value of id property as “map”.
In your equivalent page typescript file, create a map object as shown below:
Now run your project and you will see a map on your screen.
Map Interaction
You can do everything you do on Native Map SDK with Cordova Map Plugin. For example, using below code you can change camera position of the map.
You can move the map camera in animation or non-animation mode.
Non-animation mode:
Animation mode:
Drawing on a Map
This section describes how to draw shapes like marker, circle etc. on map. Besides drawing, these shape also has listener events. In this article, we will add marker, draw circle and polyline on map
Adding Marker
To add marker on map, use addMarker method of the HuaweiMap object. This method return a marker object. You can use this method to customize marker or get property of marker later.
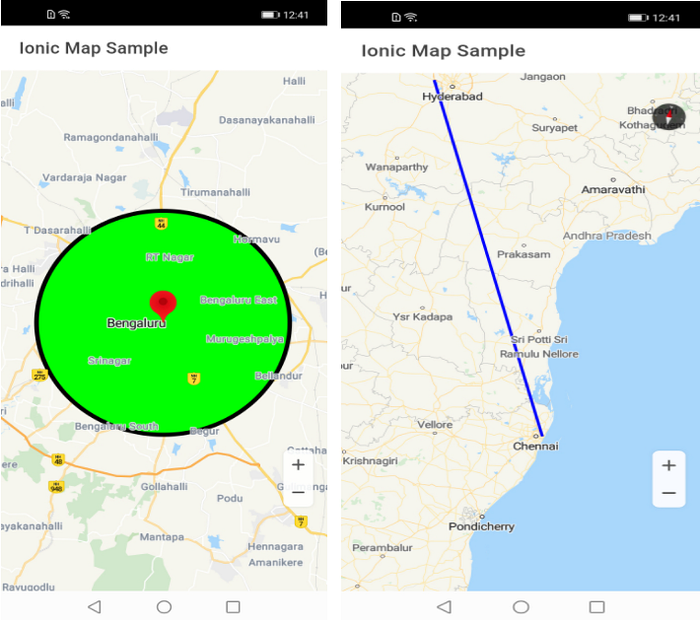
Adding Circle
Creating circle object is very similiar to what we did on marker. In this time use addCircle method of the HuaweiMap object.
Drawing Polyline
To draw polyline between coordinates
Conclusion
In this article, We have learnt how to integrate HMS Map Plugin to ionic project and shown some basic features of the plugin.
